We haven't forgotten about the blog. This month has just been very busy for us. We have taken a lot of pictures of our dining experiences and will post them up sometime soon. I'm also working on a new slide show for the blog. Stay tuned.
We hope you had a wonderful Christmas!
~Christine and Lucy
Saturday, December 29, 2007
Tuesday, December 11, 2007
Bun Thi Nuong - Cha Gio aka Homemade Spring Rolls
For lunch on this beautifully sunny and snowy day, we made bun thit nuong at my grandpa's house. We eat this all the time but not often enough. I've refered to this as vermicelli salad with pork chops and spring rolls, which it is. If you want to read about the other times I've posted about bun, just go here, here and here. Up until now, I haven't known the Vietnamese name. But now I know and now you know - if you didn't know already. Bun thit nuong cha gio. There are a bunch of letters with accents, but I have no clue as to how to type them in.
Unlike the previous posts, this one will be more detailed. I still don't have accurate measurements for you guys yet, sorry. [If you haven't read my other posts, save yourself from the vague descriptions and just pretend that I've posted all my entries like this one.]
To make the vermicelli salad, you need to make the vermicelli/noodles - of course. Depending on how many people you are serving, cook the vermicelli needed. Once it's cooked, strain it, then rinse them under cold water and then drain it. Put a damp cloth over the strained vermicelli to prevent it from drying out. We usually squeeze out the excess water and then fold handfuls of vermicelli in U-shaped serving portions. You don't have to do that, but it's recommended that you do if you're serving a large group. The vermicelli is done, strained, and ready to be eaten.
To make our spring roll filling, you'll need to shred some cabbage and carrots (we used two large carrots and a half of a large cabbage), dice some onions, and get some ground pork. (I don't know about this, but I think you can substitute the pork for ground chicken or turkey.) Oh, if you want, you can keep some shredded carrots on the side, to be added into the salad in the end. Sauté the onions and then the ground meat in a bit of oil.
 Season it with salt and pepper, and then add the shredded cabbage and carrots. Cook the cabbage and carrots until they're soft and then add more seasonings to your taste - mainly oyster sauce and sesame oil. (Be careful not to put too much sesame oil if you haven't used it before. It's very strong, so you don't need very much.) Turn off the heat and push the mixture to the side of the pot, that way the juices can collect somewhere. You don't want the mixture to be saucy because it will make the spring rolls soggy and that's just gross.
 Before using the filling to wrap the spring rolls, make sure it's cooled down to room temperature. If you're in a hurry, put it outside in the cold, snowy outdoors. If it's not cold or snowy outside where you live, tough luck, you just have to wait for a couple of hours. Just kidding. I'm sure you can put the mixture in the freezer to cool or something. Remember: push the filling to the sides of the pot. It not only helps drain the juices but it also helps the mixture cool quicker. You can add the juices in your salad after. If the filling is too wet, the spring rolls won't be crisp once deep fried.
 Let that marinate for overnight (if you've prepared it ahead of time) or until you're ready to cook them. The pork is marinating and it's ready to be cooked and eaten.
To make the spring rolls, you'll first have to get out your spring roll wrappers, which are usually available at your local Chinese super market. Make sure it has fully defrosted, if it's been in the freezer, before you separate them. The outside layers are tricky because they're usually moist and/or mushy. After you get rid of any mushy bits, start peeling them carefully. You'll notice that the easier ones are near the middle of the stack because they aren't as moist, so they separate easier. I should probably mention that today we cut the large spring roll wrappers in half - diagonally. I personally like my spring rolls that size. I don't like my spring rolls too big or too small... they have to be juuuust right. Umm.. yeah. That sounds wrong. Anyway, my reasoning is this: if they're too big, then there's too much stuffing. If they're too small, then there's not enough stuffing. There needs to be balance.
 Step 3: Dip your finger in some warm water and brush the top corner, then roll your spring roll tightly. Repeat the three steps until you run out of spring roll wrappers or filling.

Unlike the previous posts, this one will be more detailed. I still don't have accurate measurements for you guys yet, sorry. [If you haven't read my other posts, save yourself from the vague descriptions and just pretend that I've posted all my entries like this one.]
To make the vermicelli salad, you need to make the vermicelli/noodles - of course. Depending on how many people you are serving, cook the vermicelli needed. Once it's cooked, strain it, then rinse them under cold water and then drain it. Put a damp cloth over the strained vermicelli to prevent it from drying out. We usually squeeze out the excess water and then fold handfuls of vermicelli in U-shaped serving portions. You don't have to do that, but it's recommended that you do if you're serving a large group. The vermicelli is done, strained, and ready to be eaten.
To make our spring roll filling, you'll need to shred some cabbage and carrots (we used two large carrots and a half of a large cabbage), dice some onions, and get some ground pork. (I don't know about this, but I think you can substitute the pork for ground chicken or turkey.) Oh, if you want, you can keep some shredded carrots on the side, to be added into the salad in the end. Sauté the onions and then the ground meat in a bit of oil.
Season it with salt and pepper, and then add the shredded cabbage and carrots. Cook the cabbage and carrots until they're soft and then add more seasonings to your taste - mainly oyster sauce and sesame oil. (Be careful not to put too much sesame oil if you haven't used it before. It's very strong, so you don't need very much.) Turn off the heat and push the mixture to the side of the pot, that way the juices can collect somewhere. You don't want the mixture to be saucy because it will make the spring rolls soggy and that's just gross.Before using the filling to wrap the spring rolls, make sure it's cooled down to room temperature. If you're in a hurry, put it outside in the cold, snowy outdoors. If it's not cold or snowy outside where you live, tough luck, you just have to wait for a couple of hours. Just kidding. I'm sure you can put the mixture in the freezer to cool or something. Remember: push the filling to the sides of the pot. It not only helps drain the juices but it also helps the mixture cool quicker. You can add the juices in your salad after. If the filling is too wet, the spring rolls won't be crisp once deep fried.Let's say it's already cooled down; the filling is done, strained, ready to use, and ready to be eaten (if you're stomach can't wait).
To make the pan fried pork chops (we had today), you need yourself some pork chops, about an inch thick. In a bowl or container, add oyster sauce, salt, sugar, pepper, finely chopped kaffir lime leaves, and pounded lemon grass and garlic.
To make the pan fried pork chops (we had today), you need yourself some pork chops, about an inch thick. In a bowl or container, add oyster sauce, salt, sugar, pepper, finely chopped kaffir lime leaves, and pounded lemon grass and garlic.
Let that marinate for overnight (if you've prepared it ahead of time) or until you're ready to cook them. The pork is marinating and it's ready to be cooked and eaten. To make the spring rolls, you'll first have to get out your spring roll wrappers, which are usually available at your local Chinese super market. Make sure it has fully defrosted, if it's been in the freezer, before you separate them. The outside layers are tricky because they're usually moist and/or mushy. After you get rid of any mushy bits, start peeling them carefully. You'll notice that the easier ones are near the middle of the stack because they aren't as moist, so they separate easier. I should probably mention that today we cut the large spring roll wrappers in half - diagonally. I personally like my spring rolls that size. I don't like my spring rolls too big or too small... they have to be juuuust right. Umm.. yeah. That sounds wrong. Anyway, my reasoning is this: if they're too big, then there's too much stuffing. If they're too small, then there's not enough stuffing. There needs to be balance.
Step 1: Near the bottom of the wrapper, place some of your cooled spring roll filling. Make sure you leave some space at the edges, like so, that you have room to seal the filling in.
Step 2: Fold the two side corners in and fold the bottom toward the top corner and tuck it in, like so, that way the filling is sealed.
Step 3: Dip your finger in some warm water and brush the top corner, then roll your spring roll tightly. Repeat the three steps until you run out of spring roll wrappers or filling.Look at my mom's and you can almost see her spring roll beaming with confidence. Now it's my turn to try.

Umm.. yeah. I was told that I didn't add enough stuffing and that I didn't roll it tight enough - all at the end. Mine definitely looks sad.Heat up some vegetable oil to medium high. The spring rolls are ready to be fried when the oil gently bubbles when you dip a bit of the raw spring roll into the oil. Don't crowd the pot too much or else the oil will lose too much heat. If your spring roll wrapper loosens, try holding the spring roll together in the oil for a second. The spring rolls are done when they're lightly golden. Drain the spring rolls on a cooling rack and/or a paper towel lined plate.

Everything is done and ready to be eaten. No? Then hurry up and fry up those pork chops and slice them into small strips. Now you're ready to eat. Wait, I lied. You have to make the fish sauce to go with the vermicelli salad.
To make the fish sauce-sauce-thing (nuoc cham), you need to dissolve one part sugar (none of that 'no calories' crap) into two parts of warm water. Then add one part EACH of fish sauce and white vinegar. If you want, you can add finely chopped up garlic and chili peppers.
Finally, everything is ready to be assembled into a large bowl and devoured, I mean, eaten. Add some of the drained vermicelli, shredded carrots, cucumbers and lettuce, crushed toasted peanuts (optional), fish sauce, sliced pork and the spring rolls all into your bowl. Now for a moment of silence. Just look at the meal you're about to eat. So beautiful. Okay, now you can eat it all.
I hope that was a very hopeful post, unlike that last one. One day I'll get the exact measurements of everything so that you, too, can eat this.
Monday, December 10, 2007
Sesame Balls - Dec. 2nd
 You've probably see them in Chinese bakeries and dim sum places. They can be filled with either sweet or salty things, like the time I tried some at the Welcome Back Restuarant. I'm not sure what they're called, but I think it's right. [I know the picture is blurry. My brother was trying to keep still for a close up shot, but it was still piping hot.]
My mom decided she wanted to try making deep fried sesame balls. Today, my mom wanted to try making a dessert one with a mung bean filling. 
I have no idea what the recipe for any of it is because she made it all so quickly. See? I have the pictures to prove it. Here she is swiftly making the little balls.
Booo... I hate blurry pictures. They make me sad. T_T
Here are some balls in a bowl of sesame seeds. They don't look pretty at this stage, but you just have to reshape them before you put them in the fryer. Now they're ready to be fried! Yay! Now get in line. No, get in line behind me.

The trick to successful sesame seed balls is controlling the temperature of the oil. If the outside layer is too thick, the dough wouldn't cook all the way through. If the oil is too hot, the outside would burn quickly and the inside would not be heated through. The first couple that were made weren't cooked properly and had to be, sadly, thrown out. See the one on the far right? Yeah that big one. It wasn't cooked - I should know, I tried to eat it.
These are so amazing. My mouth is watering just looking at these pictures. Crunchy on the outside, a bit sticky from the glutinous rice dough, and a sweet mung bean filling. I'm definitely going to order this next time I go for dim sum. Well, that is if they have a dessert one. Next time my mom is going to try to make savoury ones. Stay tuned.
The next day, December 3rd, it snowed some more. This was the snow storm that hit most of north eastern provinces and states. We had something like a foot of snow. Here's a cute picture of our future Christmas tree that day.. muhahahaa! Nah, just kidding.

Sunday, December 09, 2007
Homemade Butter Chicken - Nov. 28th
Unlike the last time we had butter chicken, we didn't use a pre-made sauce. After talking with someone at work about the butter chicken we had, she was told that we needed tandoori masala, sour cream (or plain yogurt) and cream to make butter chicken from scratch. So being the person she is, my mom decided to go out, buy everything we needed, and try making it for herself. For about $3.00 at an Indian grocery store, we got this jar of tandoori masala. [I'm not sure what the address is, but it's across the colisseum on Carling. I'll find out where it is and add it on later.]
We had bought some cream, sour cream, and (a whole) chicken on the weekend and we still had some leftover naan that was in the freezer, so we had everything we needed.
To start everything off, we made some rice. We then cooked the chicken and added the tandoori masala to the chicken after it was cooked. Once we did that, cream and sour cream was added to finish everything off. We tasted it and I thought the flavour was weak, so I threw in more of the tandoori masala. We made sure to not boil the mix, because we didn't want the milk products to split.
My dad wanted more sauce so more cream was added to this. We turned off the heat and tossed the defrosted naan into the 350 degree oven.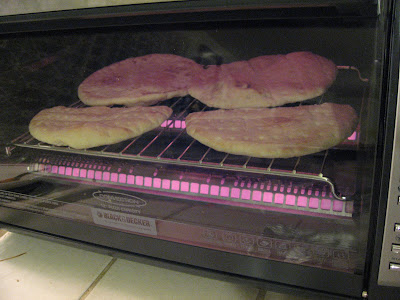
The rice finished cooking, so my dad added a couple of chunks of frozen coconut milk and butter to the rice. Oh yeah, and I threw in butter in the chicken mixture... which made... Butter Chicken!! Yay! 
"You can't have butter chicken without butter", I said, before adding some into the chicken mixture.
I prefer and suggest that you all go out and buy some tandoori masala or garam masala at an Indian grocery store to make butter chicken. It's not hard. Just follow my uh.. detailed and helpful steps above. I'll try to make a better version in the future. Well it's all based on your taste buds. The spice blend had a bit of heat, which I liked. If you don't like that much heat, you can add more sour cream to cool it down. Hope that helps. ^_^
Subscribe to:
Posts (Atom)