In the months following my trip to Asia (2011), I've had bad cravings for pot stickers (guotie, 鍋貼) and soup dumplings (xiao long bao, 小籠包). In Cantonese, pot stickers are called wor tip.
While we usually make dumplings with store bought dumpling wrappers, I thought I’d try to make everything from scratch this time. Since Jimmy's mom showed us the new fry-steam-fry method (which I'll describe in more detail in a bit) to cook dumplings, I was itching to make dumplings that not only looked great, but taste better than restaurants. My goal was to make juicy pot stickers like the chicken pot stickers at the Northern Dumpling Kitchen. Follow me on my quest on perfecting homemade pot stickers.
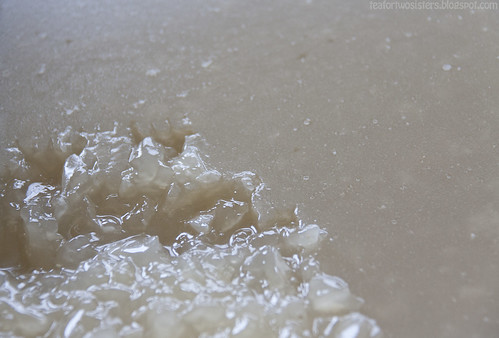
With that in mind, I planned to make some juicy pot stickers. First, the juicy part. I made some pork soup (with pork neck bones, carrots, onions, and nappa cabbage) one December night. Rather than boil pork hocks or other things to naturally turn the soup into jelly, I just added a few teaspoons of agar agar. The soup was poured into a pan and the pan was placed in the fridge to firm up. I didn’t put enough agar agar though. The soup turned into soft jello and some of it turned back into a liquid.
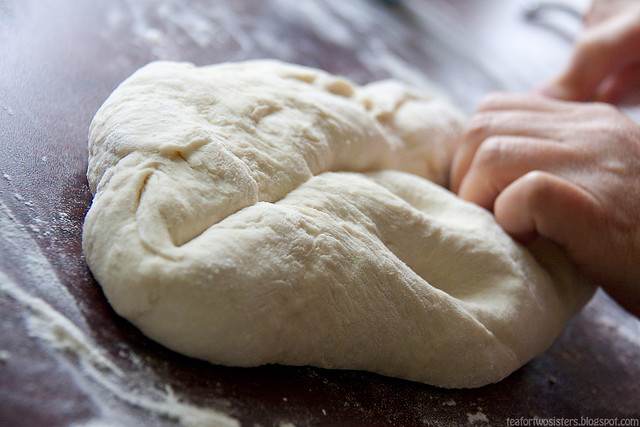
Inspired by Jimmy's mom's version of the pot stickers, the dough was made from flour, water, sugar, yeast, baking powder and salt. Mom and I just guessed at the ratio and it turned out. The dumpling skins were going to be bready once cooked, so based on the soup filling and bready skin, I should probably refer the dumplings as sheng jian bao (生煎饅頭). Meh.
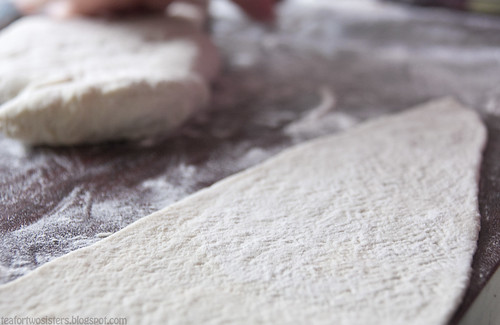
Mom used our pasta roller to roll out the dough.
Mom used our pasta roller to roll out the dough.
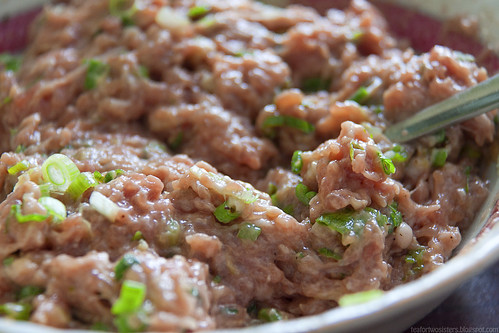
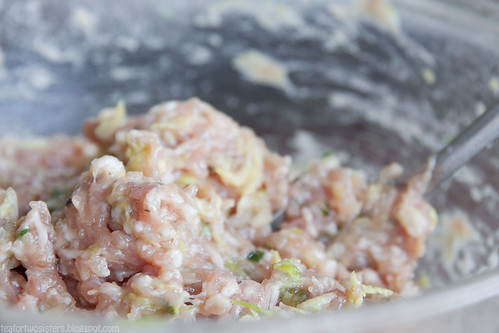
While she did that, I mixed ground pork, oyster sauce, sesame oil, cornstarch, sugar, green onions, and a few teaspoons of black pepper in a bowl to make the filling.
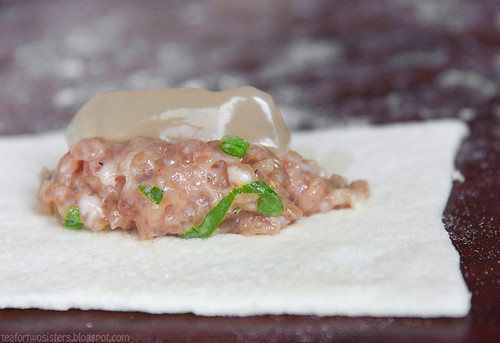
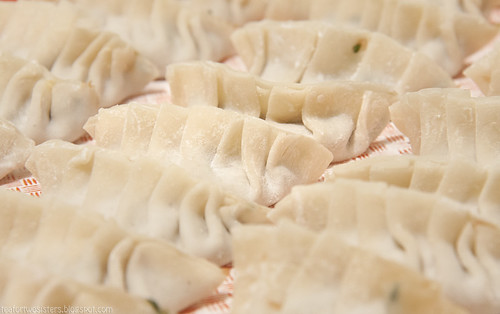
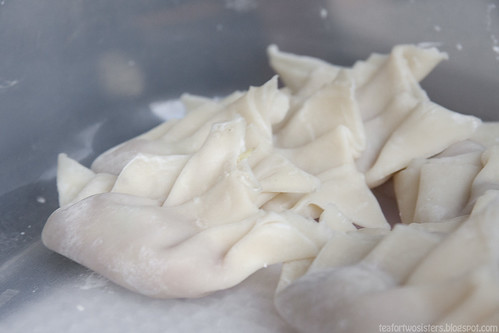
We tried cutting the rolled-out dough into circles, but I found it much easier to wrap the dumplings when the dough was cut into rectangles. The wet jellied soup made it difficult to seal up the dumpling skins though. I sprinkled enough flour to turn the wet dumpling skins into sticky skins.
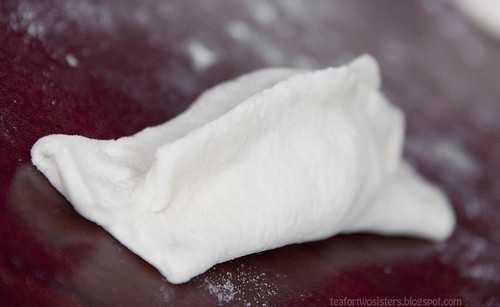
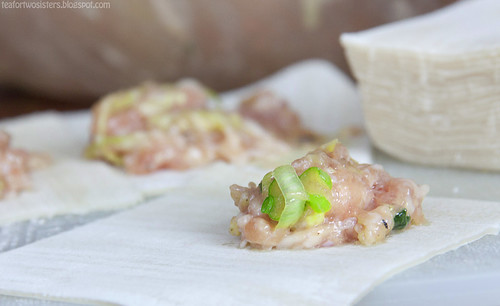
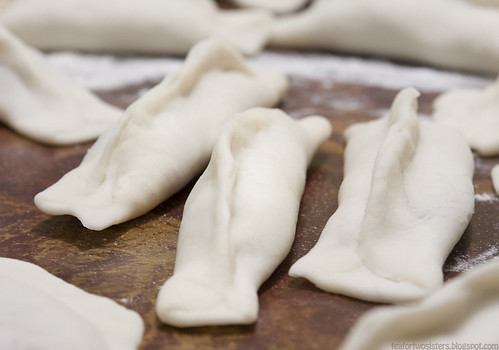
I scooped some pork filling and then some soup jelly. I brought up the sides of the wrapper and then flattened the ends to make dumplings. As long as they were sealed, I was happy. When the soup jelly became too soft and tough to work with, I reheated the soup and added a bit more agar agar. The soup was poured into a pan again and left outside on the balcony in the bone-chilling weather. When it tightened up into a firmer jello, we mixed the soup into the pork filling which made things easier to wrap. Once the dumplings were wrapped, the only thing we had to do was cook and eat them.

Fry-Steam-Fry Method
After more than a few trials and errors I'd like to admit to, I've narrowed down this cooking method to almost perfection. Here are the following steps to the fry-steam fry method:
After more than a few trials and errors I'd like to admit to, I've narrowed down this cooking method to almost perfection. Here are the following steps to the fry-steam fry method:
- On medium-high heat, heat up a pan with enough neutral-flavoured oil (I used vegetable oil) to just coat the bottom of the pan.
- Place the wrapped dumplings in the pan and let the bottoms cook and firm up.
- Once the bottoms of the dumplings have a light golden colour and you're able to move the dumplings around, cover the pan with a properly fitting lid and add about a third of a cup of water under the lid into the hot pan. There should be a lot of sizzling going on when you add the water or else the pan isn't hot enough.
- Let the dumplings steam. Don't move them around. You can lift up the lid to check the amount of water left, but make sure you lift it away from you. The steam can burn ya.
- Before all of the water has evaporated, take off the lid and set it aside. At this point, you should be able to move the dumplings freely. Turn down the heat a bit.
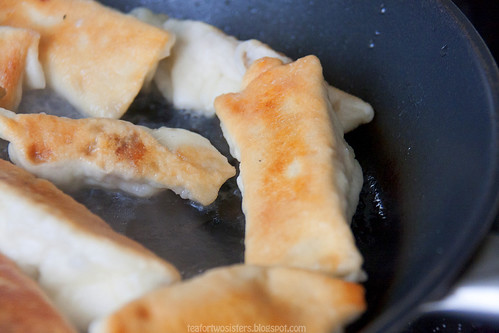
- Let the bottoms of the dumplings turn golden and crisp. If you'd like, you can turn the dumplings on its side to crisp up. I don't think it's necessary.
- Serve the dumplings while hot.
- Repeat steps 1-7 if there are more dumplings to be cooked.
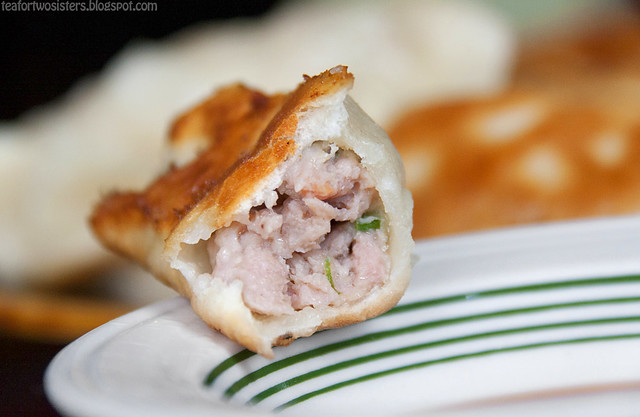
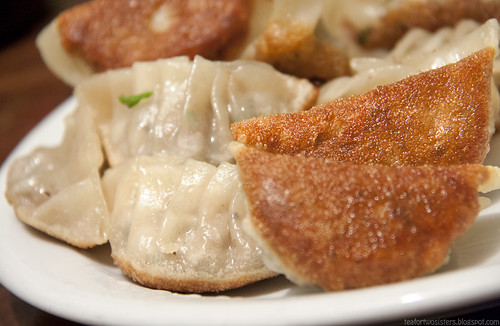
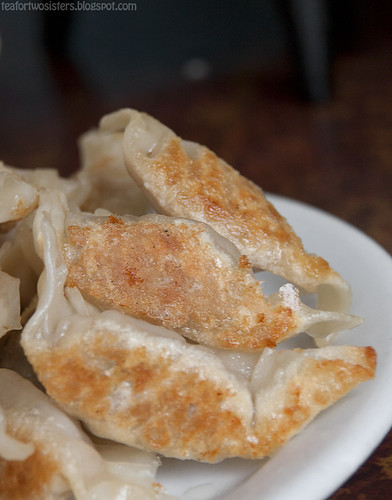
I flipped the dumplings back and crisped up the bottoms. When I cooked the second batch, I stuck to steaming the dumplings once and they turned out less soggy than the first batch. None of the pot stickers had any soup inside though. The bready dough drank all the soup, which rendered the dough a tad soggy. I guess I need to make a different style of dumpling wrappers if I want to be able to pour out the soup like properly made soup dumplings. But even though that didn’t turn out, I really liked the bready pot sticker wrapper. It added another dimension to the dumplings. The dumplings' crisp armor yielded to soft, fluffy delicious bread, which protected the tender, and juicy ground pork filling.
The dumplings were served with a dish of soy sauce and red vinegar. These were good but I felt like I needed to simplify things. Instead of adding soup, I just need to concentrate on making decent dumpling skins and a flavourful filling first.
A few weeks later, I tried to tweak the flavour of the filling. Ground chicken (it was on sale), oyster sauce, sesame oil, finely shredded ginger, and cornstarch were all mixed together. We didn’t have any green onions, cilantro, nappa cabbage, or bok choi, which I usually add, so tofu was used to soften the filling. I seasoned the filling more aggressively because the tofu would've diluted the flavour.
Lucy taught me how to “properly” wrap the dumpling wrappers – again. I got the hang of it and we blew through the wrappers in no time at all. Half of dumplings were frozen for later consumption. The other half was cooked with the fry-steam-fry method.
These tasted a lot like the dumplings I ate in Shanghai. The amount of sesame oil and ginger were spot on! I really liked addition of tofu in the ground chicken filling, although the tofu felt like it could burn through the table - it was that hot. The tofu didn’t add any flavour to the filling, but it did softened the filling enough and made the dumplings juicy. I found that the molten hot tofu kept the dumplings hot for a longer period of time.
I’ve done many more trial runs of both the fluffy dough and a variety of fillings since then. I’ve been honing in on an amazing filling. I tend to use ground pork in the filling because I like pork and the meat has some fat, which makes the dumplings juicy. But I have used ground chicken and it works out great. If you do use ground chicken, you'll need to add more tofu/napa cabbage leaves to soften the meat.
The filling has a base of lean ground pork, a vegetable, oyster sauce, ginger, sesame oil, sugar and cornstarch. During this past weekend, I used the soft leafy parts of some napa cabbage, a bit of green onions to help brighten the filling, and some black pepper. The soft leafy parts of the napa cabbage adds a great background flavour inside the filling. The hard parts could be used too, but we were having hot pot that night so we left them out of the filling.

Most of the filling was wrapped using Shanghai dumpring wrappers (watch this clip and skip to 3:20). I used the fry-steam-fry method once again. I cut down on the oil and just heated the pan up a bit longer.
I needed to do two batches, but they all turned out great! The tips of the wrappers were chewier and the filling was balanced properly. The napa cabbage leaves added a nice sweetness to the savoury filling. As for the cooking method, only two or three dumpling skins ripped off, which is a huge difference from some of the batches I've made in the past. One time, when I was still learning how to properly use the fry-steam-fry method, all of the dumplings stuck to the bottom of the pan. Lucy had to scrape them into a bowl, when she foolishly ate them all.
On Monday, I mixed in some extra ground pork (from the fish cakes) into the filling and added some more oyster sauce, ginger, green onions and sesame oil. Instead of making the bready dumpling skins, I tried whipping up some Shanghai dumpring skins.
Sugar and salt were dissolved in lukewarm water and mixed into all-purpose flour. The dumplings skins needed to have some sort of flavour. I hoped that adding some sugar would give a good contrast to the salty filling. I added enough lukewarm water to bring the dough together. As I began to kneed the dough, the dough became sticky so I added a few tablespoons of flour. I slammed the dough against the table a couple of times and then let the dough rest for about an hour.
Once the dough was rested, I rolled out the dough into a thin log and sliced the dough. With each slice of dough, I rolled it into a long beavertail-like shape. I wasn't sure how strong the dough was so the first few dumplings were made with thicker skins.
As I continued to wrap more dumplings, I realized that the dough was quite strong and forgiving. The dough was rolled thinner and thinner until they were eventually translucent. At the end, the thickness of each piece of rolled out dough was similar to wonton skins. They were much stronger than I thought.
I didn't know how the thin wrappers would cook up though. But I just trusted that they'd hold up in the pan.
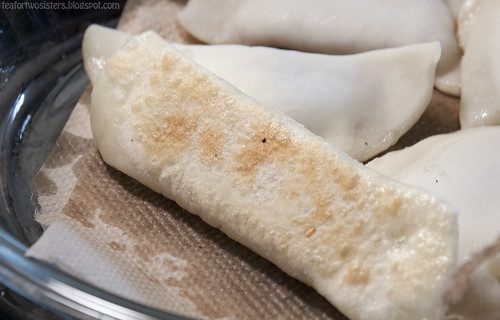
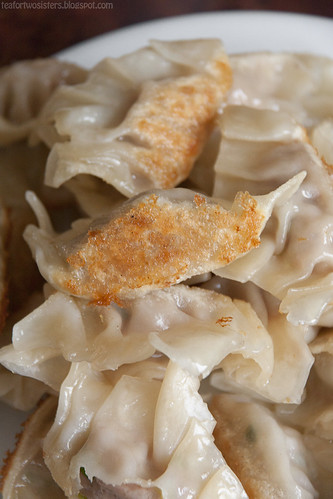
This was the colour of the pot stickers before I added the water. I left the pan alone until most of the water evaporated. At that point, I turned the heat down a bit and took off the lid.
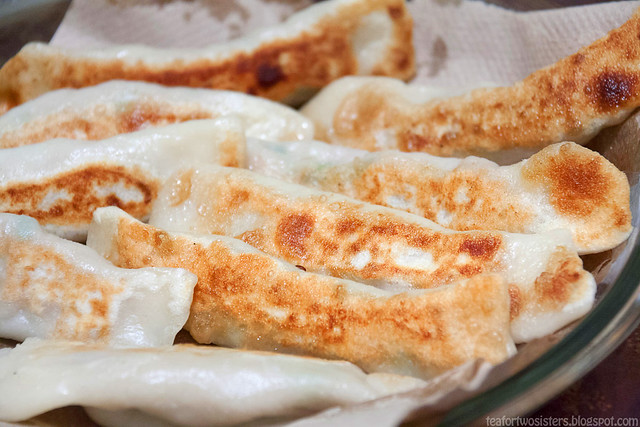
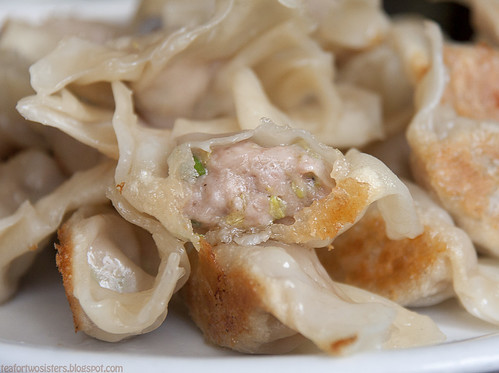
The dumplings were allowed to crisp up one last time. Done. These reminded me of the dumplings I had in Taiwan. The super thin dumpling skins held up amazingly in the pan! These would make the perfect soup dumplings.
I cooked all the dumplings in three batches on Monday. By the last batch, the pan had very little vegetable oil. Instead of adding a bit of oil, I thought to myself: could I get away with using less oil and just crisp up the bottoms using heat instead?
Turns out that as long as the bottom of the dumplings are slightly crisp, you can add the water and steam the dumplings without worrying about the skins sticking to the pan. Just make sure you leave the dumplings alone. Trust the fry-steam-fry method.
Mom said that the filling needed more ginger to provide more of an umph. She thought the wrappers turned out great. Richard wasn't a fan of the thick dumpling skins. He ended up eating one of the first couple of dumplings I wrapped. I was very happy with how everything turned out. The chewy skins were slightly sweet, which complimented the soft and salty filling very well. As for the filling, I'd probably leave out the black pepper. That's just a personal taste though.
Over the trials and errors, I've learned that you have to leave the dumplings alone. I used to move the dumplings around during the steaming method. I've also learned that the dumplings don't need much water to steam. I used to add so much water that the fry-steam-fry method turned to fry-boil-steam-fry-scrape method. Now when I add the water to the hot pan, I use about a quarter cup of water (sometimes more) when I have a pan full of dumplings.
The filling has a base of lean ground pork, a vegetable, oyster sauce, ginger, sesame oil, sugar and cornstarch. During this past weekend, I used the soft leafy parts of some napa cabbage, a bit of green onions to help brighten the filling, and some black pepper. The soft leafy parts of the napa cabbage adds a great background flavour inside the filling. The hard parts could be used too, but we were having hot pot that night so we left them out of the filling.
Most of the filling was wrapped using Shanghai dumpring wrappers (watch this clip and skip to 3:20). I used the fry-steam-fry method once again. I cut down on the oil and just heated the pan up a bit longer.
I needed to do two batches, but they all turned out great! The tips of the wrappers were chewier and the filling was balanced properly. The napa cabbage leaves added a nice sweetness to the savoury filling. As for the cooking method, only two or three dumpling skins ripped off, which is a huge difference from some of the batches I've made in the past. One time, when I was still learning how to properly use the fry-steam-fry method, all of the dumplings stuck to the bottom of the pan. Lucy had to scrape them into a bowl, when she foolishly ate them all.
On Monday, I mixed in some extra ground pork (from the fish cakes) into the filling and added some more oyster sauce, ginger, green onions and sesame oil. Instead of making the bready dumpling skins, I tried whipping up some Shanghai dumpring skins.
Sugar and salt were dissolved in lukewarm water and mixed into all-purpose flour. The dumplings skins needed to have some sort of flavour. I hoped that adding some sugar would give a good contrast to the salty filling. I added enough lukewarm water to bring the dough together. As I began to kneed the dough, the dough became sticky so I added a few tablespoons of flour. I slammed the dough against the table a couple of times and then let the dough rest for about an hour.
Once the dough was rested, I rolled out the dough into a thin log and sliced the dough. With each slice of dough, I rolled it into a long beavertail-like shape. I wasn't sure how strong the dough was so the first few dumplings were made with thicker skins.
As I continued to wrap more dumplings, I realized that the dough was quite strong and forgiving. The dough was rolled thinner and thinner until they were eventually translucent. At the end, the thickness of each piece of rolled out dough was similar to wonton skins. They were much stronger than I thought.
I didn't know how the thin wrappers would cook up though. But I just trusted that they'd hold up in the pan.
This was the colour of the pot stickers before I added the water. I left the pan alone until most of the water evaporated. At that point, I turned the heat down a bit and took off the lid.
The dumplings were allowed to crisp up one last time. Done. These reminded me of the dumplings I had in Taiwan. The super thin dumpling skins held up amazingly in the pan! These would make the perfect soup dumplings.
I cooked all the dumplings in three batches on Monday. By the last batch, the pan had very little vegetable oil. Instead of adding a bit of oil, I thought to myself: could I get away with using less oil and just crisp up the bottoms using heat instead?
Turns out that as long as the bottom of the dumplings are slightly crisp, you can add the water and steam the dumplings without worrying about the skins sticking to the pan. Just make sure you leave the dumplings alone. Trust the fry-steam-fry method.
Mom said that the filling needed more ginger to provide more of an umph. She thought the wrappers turned out great. Richard wasn't a fan of the thick dumpling skins. He ended up eating one of the first couple of dumplings I wrapped. I was very happy with how everything turned out. The chewy skins were slightly sweet, which complimented the soft and salty filling very well. As for the filling, I'd probably leave out the black pepper. That's just a personal taste though.
Over the trials and errors, I've learned that you have to leave the dumplings alone. I used to move the dumplings around during the steaming method. I've also learned that the dumplings don't need much water to steam. I used to add so much water that the fry-steam-fry method turned to fry-boil-steam-fry-scrape method. Now when I add the water to the hot pan, I use about a quarter cup of water (sometimes more) when I have a pan full of dumplings.
Going forward, I'd like to try recreating the Shanghai dumpling skins and even try to add some jellied soup to the filling. I'm sure the soup won't get absorbed into the non-leavened dumpling skins.
My next major task to try and replicate the amazingly complex Taiwanese beef noodle soup. Dun dun dun dun... Once that successfully happens, I'll be able to host a Taiwanese-themed dinner for family and friends. I'm thinking pot stickers for appetizers, beef noodle soup as the main and maybe shaved ice for dessert. I'll start taking reservations now. Just kidding.
No comments:
Post a Comment
We'd love to hear your thoughts!